.png?height=120&name=derivita-logowhite%20(2).png)
See how to view students' responses, grade them, and assign partial credit.
Getting around
When you open the Grader, you have two different modes to choose from: question-by-question and student-by-student. You can toggle between these two modes in the upper left-hand corner.
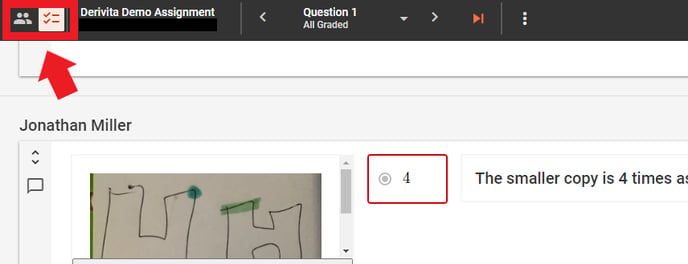
Question-by-question mode
This mode lets you to see every student's responses to a single question. So you can grade all the responses to Question 1, then switch to the next question.
Tip: Click the orange arrow at the top to go to the next question that needs grading.
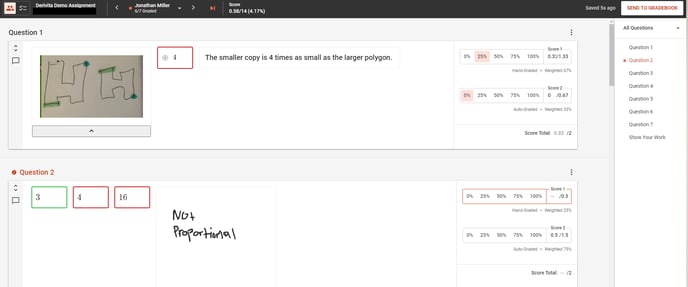
Student-by-student mode
This mode lets you see everything that a single student submitted. So you can grade all of Alice's work, then switch to the next student. If you want to see the images that a student uploaded with Derivita's Show Work feature, use this mode.
Tip: Click the orange arrow at the top to go to next student who needs to be graded.
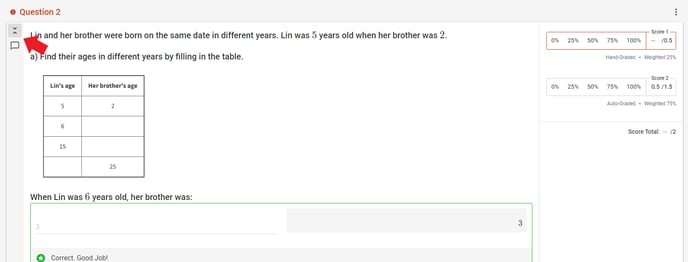
Scoring a question
Regardless of which mode you are in, you will see the questions and student responses listed on your screen. If grading is required, it will be highlighted in orange with an orange dot next to it.
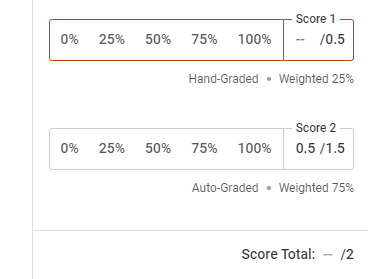
When you would like to score a student's response, you can use the scorer to quickly choose from the percentage scale or you can input a point value. The scores will then automatically update within the scorer and you can remove the updated score if needed.
Pro tip! To quickly grade the questions that are required (hand-graded) use the question-by-question mode. Once you have finished grading the first question requiring scoring, click the orange arrow at the top of the screen to navigate directly to the next question that needs grading (this will allow you to skip all the auto-graded questions).
Within the student responses, you will see the option to expand/collapse the question prompt. You can also select to view the feedback the student received, as well as view any past attempts on the problem (if applicable).
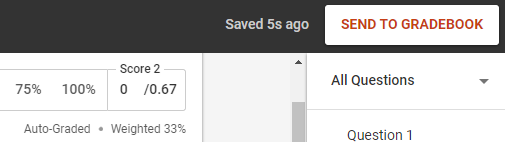
Heads up! Your edits are saved automatically, but changes to students' scores won't be visible to students or your LMS gradebook until you click Send to Gradebook.
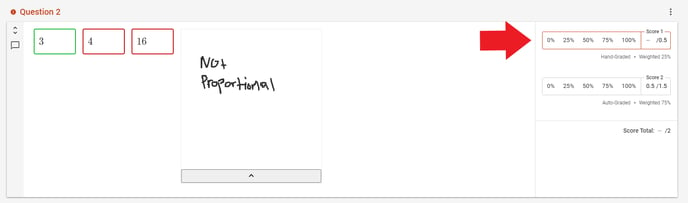
For the questions that have both a hand-graded portion and an auto-graded portion, you will see two scorers and they will be labeled to show which part they correspond to. The auto-graded score will already be set, but you can override it and apply partial credit.
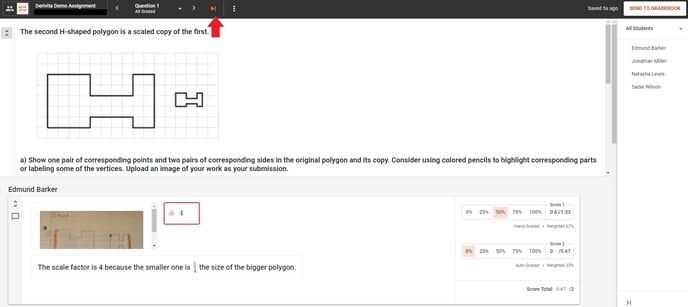
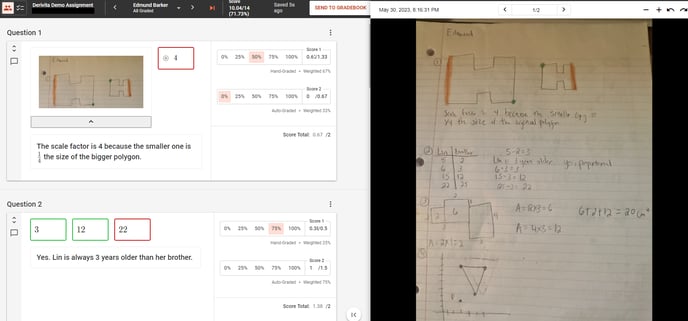
Viewing students' Show Work images
If you enable "Show Work" on your assignment, then you can view your students' work alongside their digital responses in the Teacher Workspace.
Once you are in Student-by-Student Mode, you will see the student's name at the top along with their list of questions and "Show Your Work" to the right.
Their uploaded images will be at the very bottom of all of their responses.
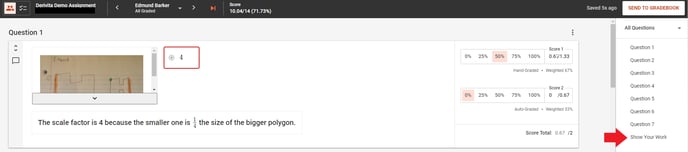
If you would like to open their uploaded images to a new window, click the icon in the upper right corner of the image.
This will allow you to view their digital responses side-by-side (or on two monitors).
Pro tip! Once you are done grading a student's assignment you can use the student switcher at the top to not only switch to the next student's digital submission, but also automatically switch to that student's uploaded image(s). This will help save you time as you are grading!
You can use the scorer to grade and assign partial credit as you are reviewing your students' uploaded work - all in one place!